How to Add Attendees to Meetings
Allow your customers to invite multiple participants to their scheduled meetings with Slotify's attendees feature. This comprehensive guide will walk you through enabling and configuring the attendees functionality for your Slotify schedulers.
What is the Slotify Attendees Feature?
The Slotify attendees feature enables your customers to add up to 10 additional participants when booking a meeting slot. This powerful functionality is perfect for team meetings, group consultations, and collaborative sessions where multiple people need to attend.
Step-by-Step Instructions: How to Enable Attendees in Slotify
Step 1: Access Your Slotify Account
- Navigate to https://slotify.ca in your web browser
- Click the "Login" button located in the top navigation menu
- Enter your login credentials using one of these methods: Username and Password: Enter your registered username and passwordSocial Login: Choose either Google or Microsoft for quick authentication
- Username and Password: Enter your registered username and password
- Social Login: Choose either Google or Microsoft for quick authentication
- Click "Sign In" to access your Slotify dashboard
Step 2: Navigate to Your Schedulers
- Once logged into your Slotify dashboard, locate the main navigation menu
- Click on "Schedulers" to view all your available schedulers
- From the schedulers list, select the specific scheduler where you want to enable the attendees feature
- Click on the scheduler name to open its configuration settings
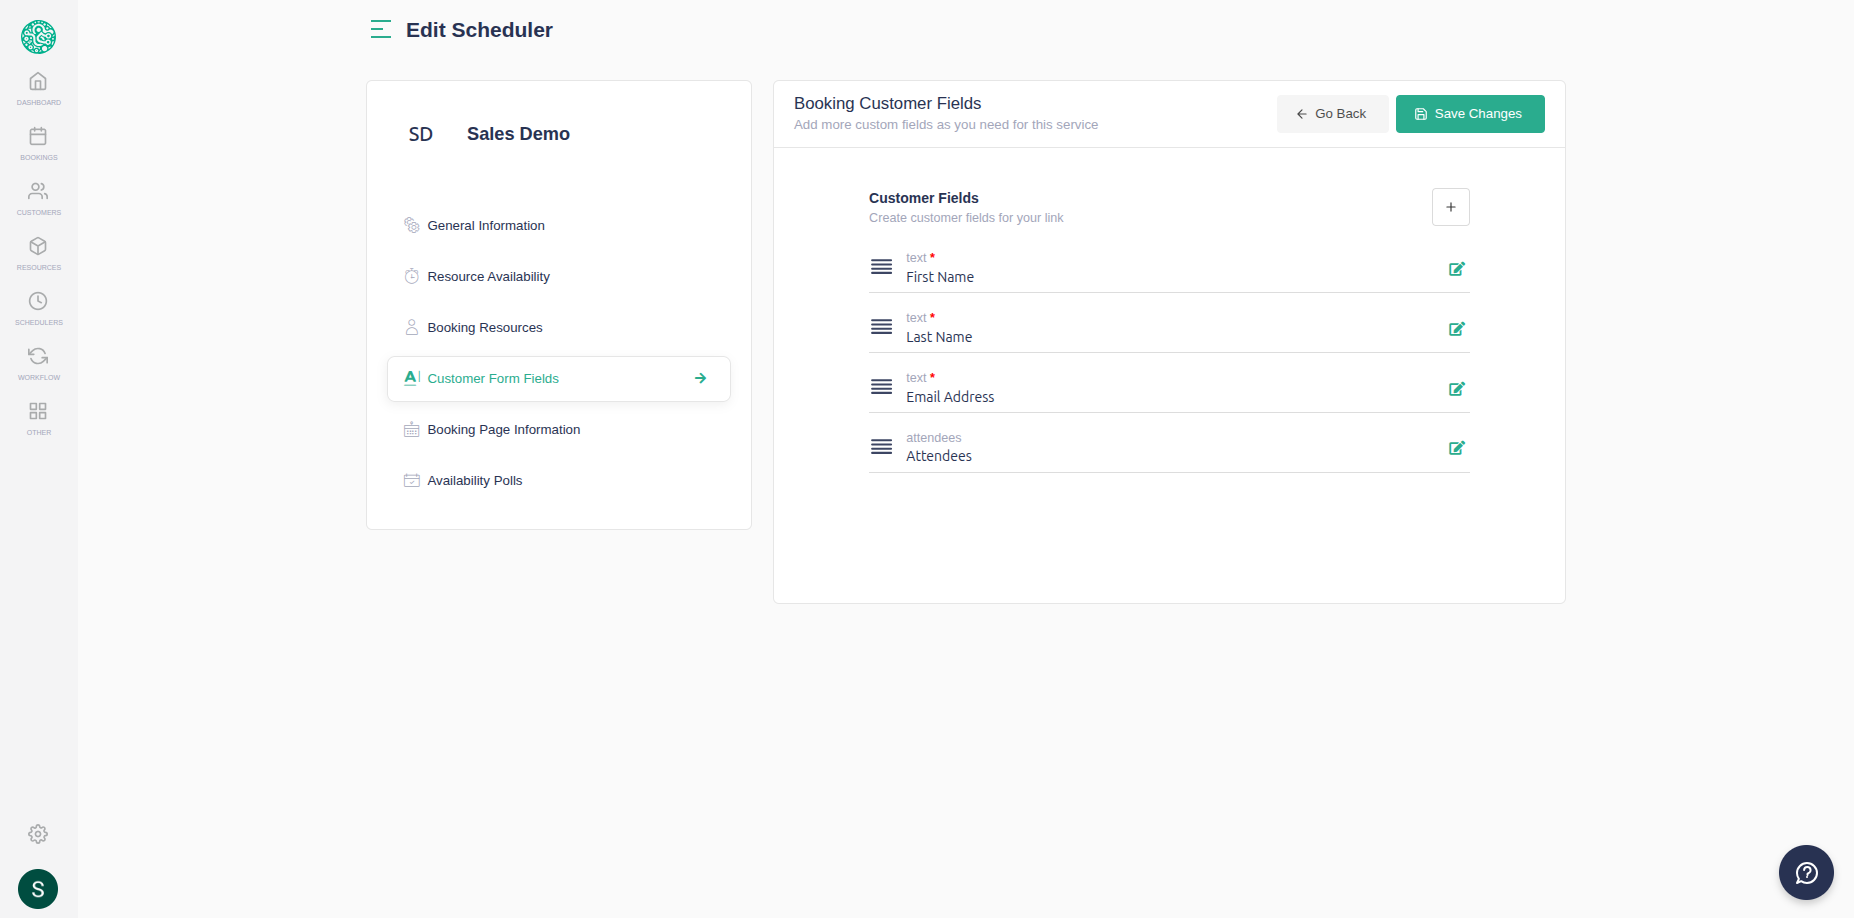
Step 3: Access Customer Form Fields
- Within your selected scheduler settings, look for the tab navigation
- Click on the "Customer Form Fields" tab
- This section controls what information customers can provide when booking meetings
Step 4: Enable the Attendees Field
- In the Customer Form Fields section, you'll notice a new "Attendees" field
- For existing clients: click the "Save Changes" button to activate this new feature
- The attendees field will now be visible in your form fields list
Step 5: Configure Attendees Field Visibility
- Locate the attendees field in your Customer Form Fields list
- Click the "Edit" icon (pencil symbol) positioned right beside the attendees field
- In the field configuration panel, find the "Hidden" setting
- Change the hidden status to "False" to make the field visible to customers
- This action marks the attendees field as non-hidden and active
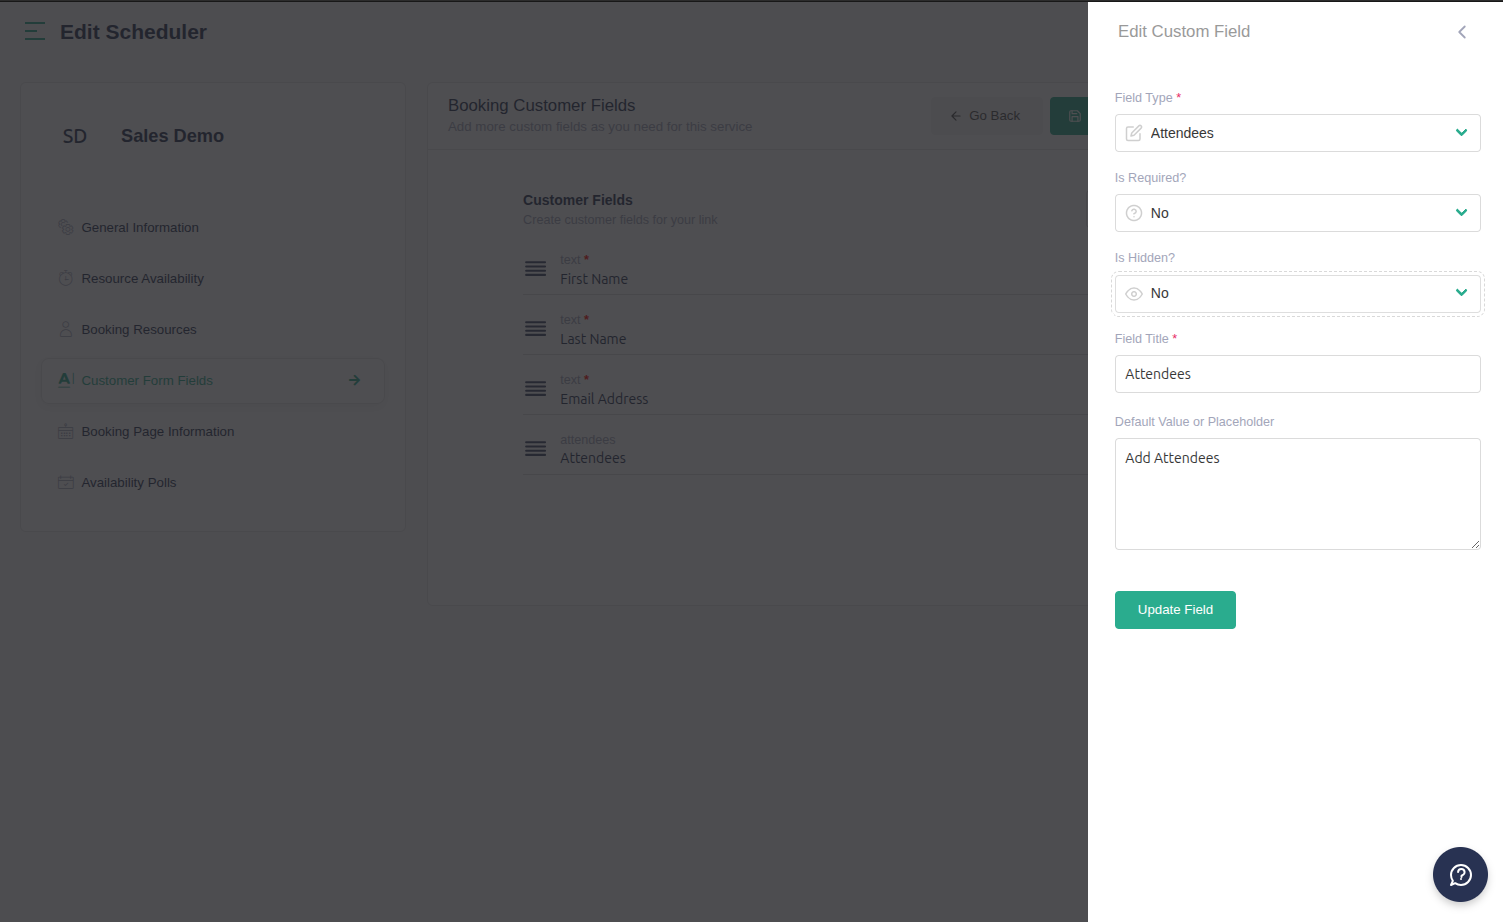
Step 6: Save Your Attendees Configuration
- After setting the hidden status to false, click "Update Field" to apply changes
- Click the "Save Changes" button to finalize your attendees feature configuration
- Your Slotify scheduler now supports multiple meeting attendees
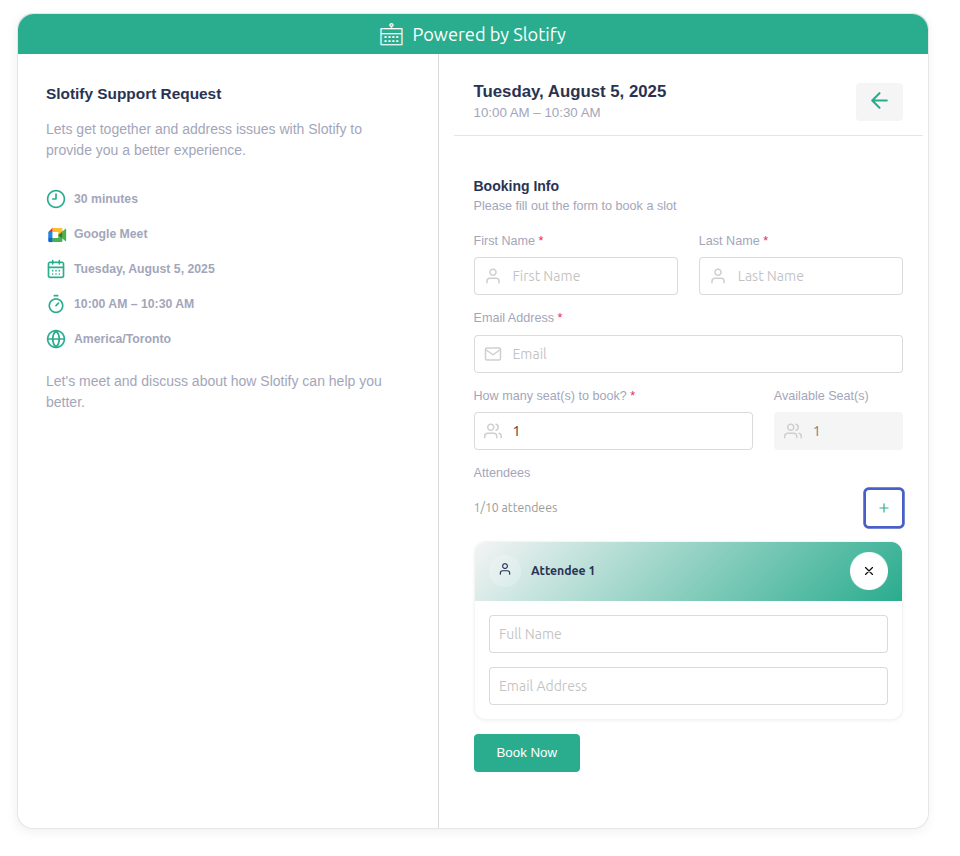
How Customers Use the Attendees Feature
Once you've enabled attendees for your Slotify scheduler, here's what your customers will experience:
- Booking Page Access: Customers visit your scheduling page as usual
- Attendees Field: A new "Attendees" field appears on the customer booking form
- Adding Participants: Customers can add up to 10 attendees for their meeting slot
- Meeting Confirmation: All attendees receive appropriate notifications about the scheduled meeting
Benefits of Using Slotify Attendees Feature
- Increased Meeting Efficiency: Handle group bookings seamlessly
- Better Organization: Track all meeting participants in one place
- Enhanced Customer Experience: Simplify the booking process for team meetings
- Automatic Notifications: Ensure all attendees receive meeting details
- Scalable Solution: Support meetings with up to 10 participants
Troubleshooting Common Attendees Issues
Attendees Field Not Appearing
- Verify you clicked "Save Changes" after enabling the feature
- Check that the hidden setting is set to "False"
- Feature works only for resource with google or microsoft calendar