Step 1: Enable Google Calendar Integration
- Log in to your Slotify account.
- Select your app from the apps list
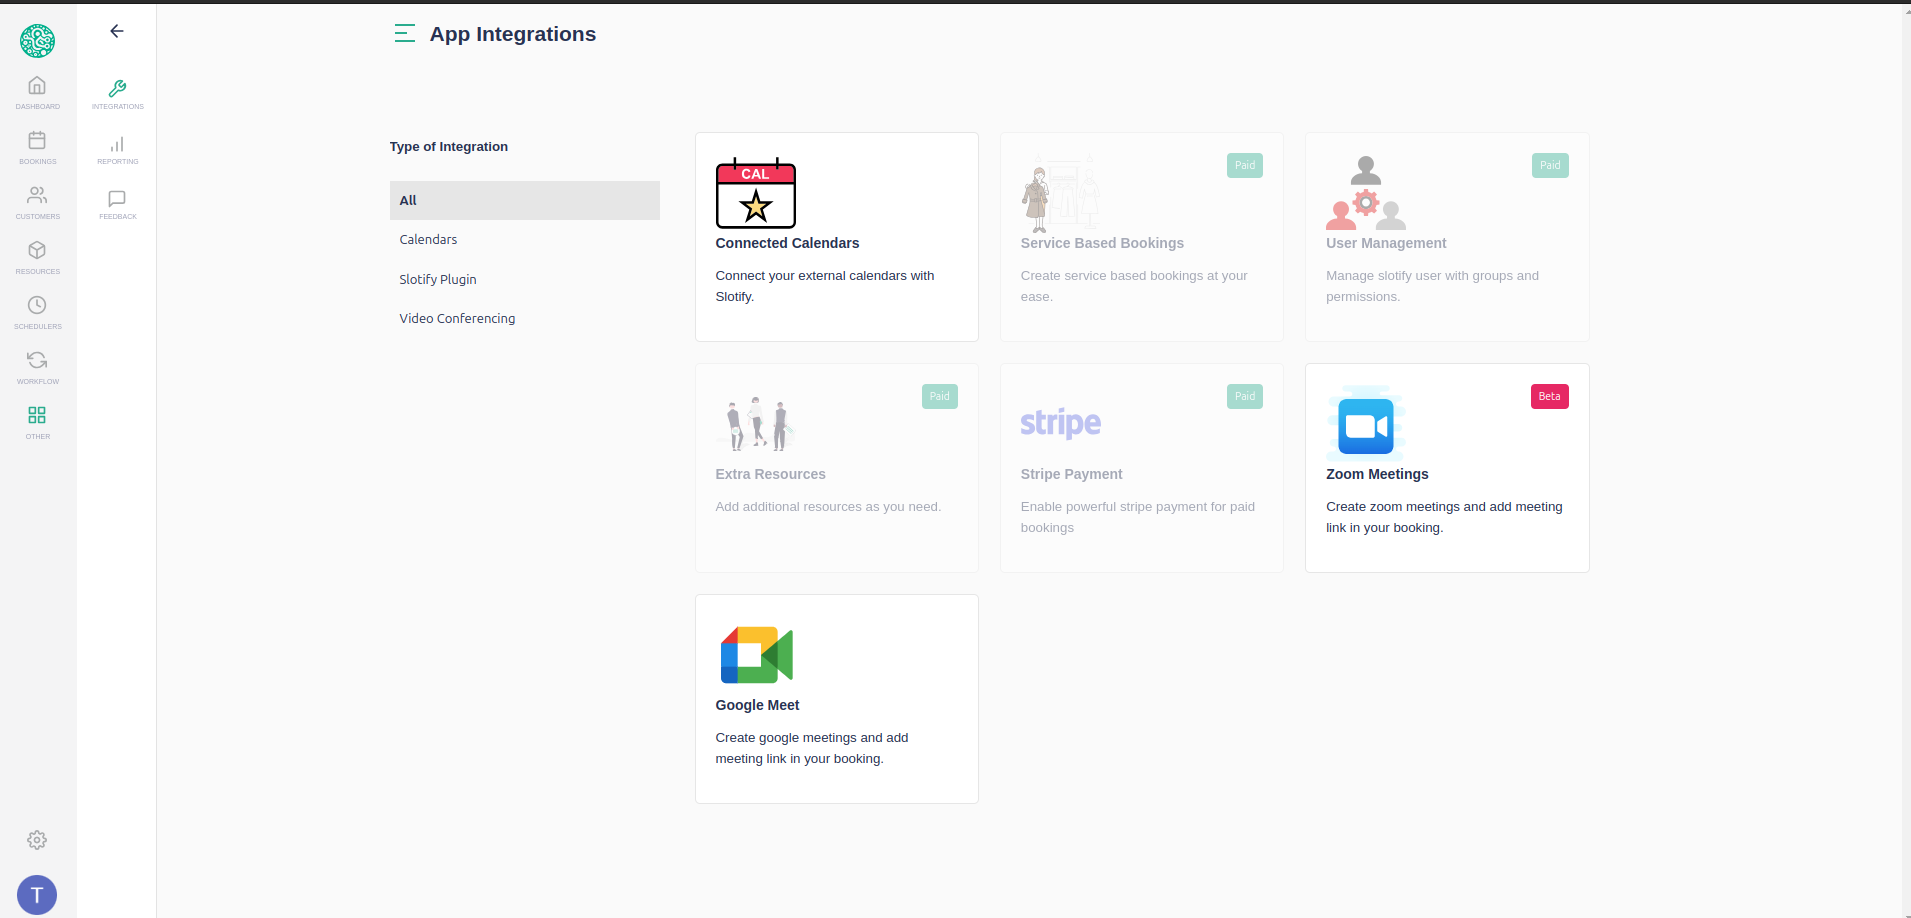
- On left sidebar menu click on Other -> Integrations menu item.
- Find Connected Calendars from the app integration list.

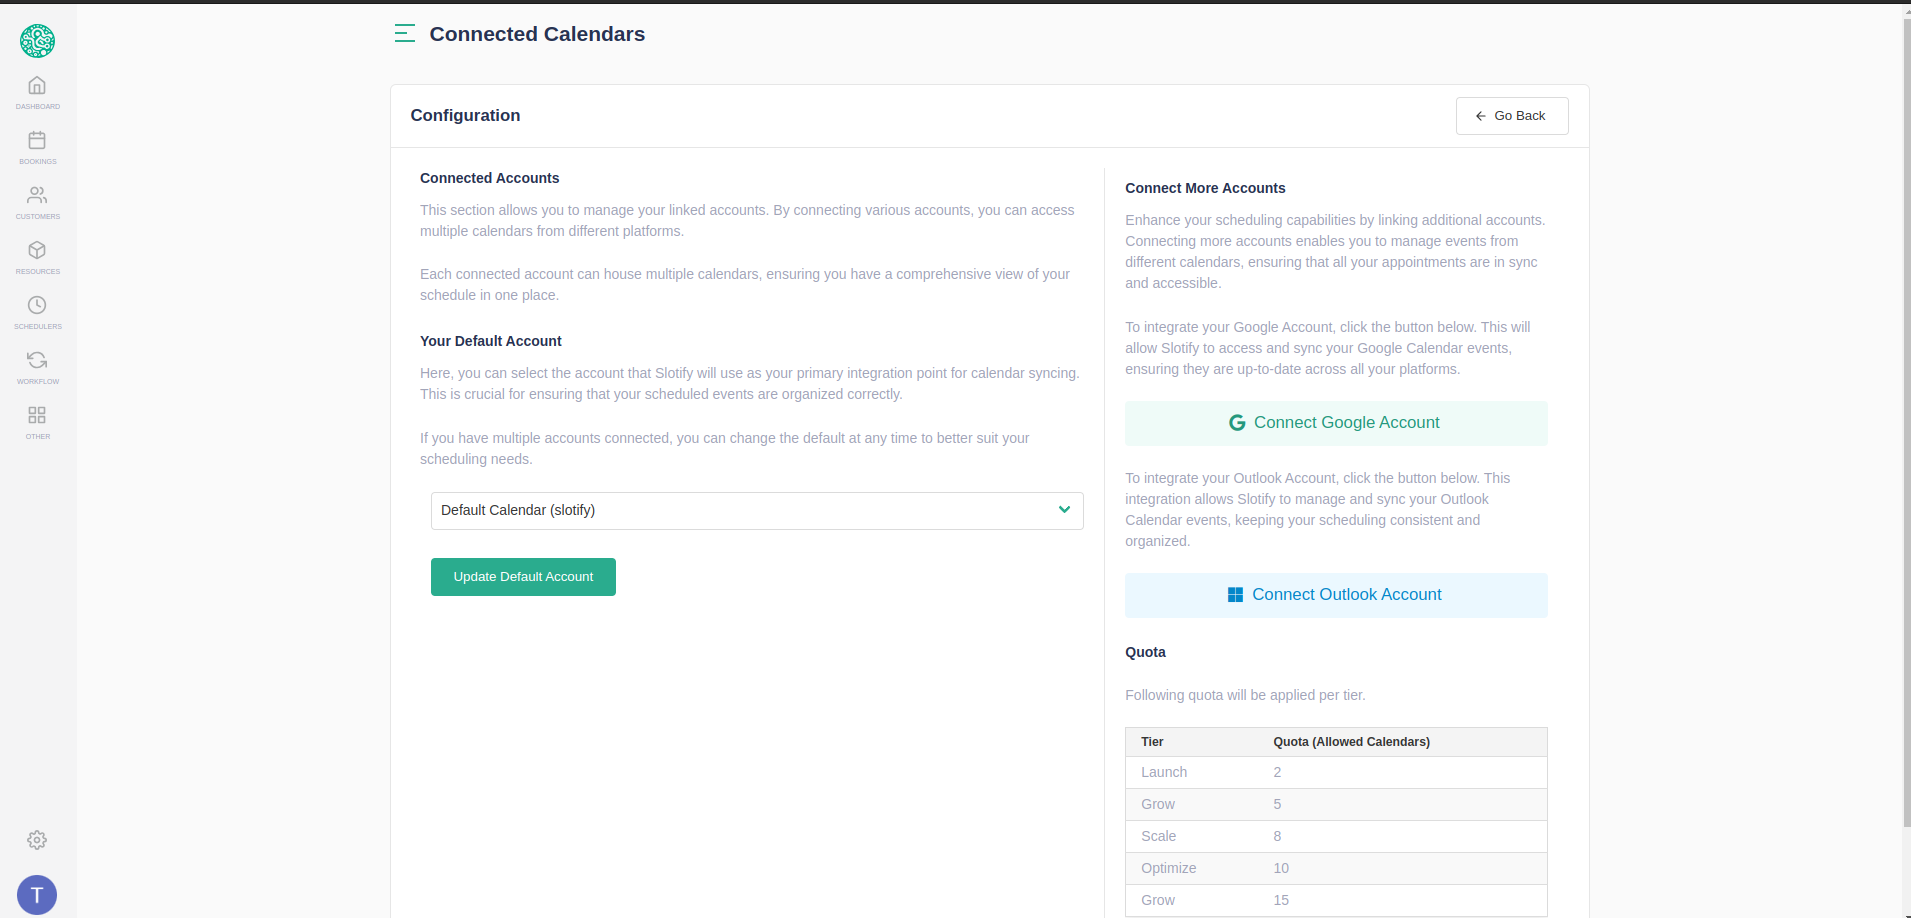
Once you click on Connected Calendar card it will open a new page.

Click on the Connect Google Calendar button which will redirect you to Google authorization page. You need to allow Slotify to permit integration.
Step 2: Grant Permissions
- You will be redirected to sign in to your Google account.
- You will see a popup asking for Google Calendar permissions.
- Once you grant permissions, you will be redirected to Connected Calendar Integration.
- On Connected Calendar integration page you will see Your Default Account. Choose your connected calendar from the drop down list it will show following options.

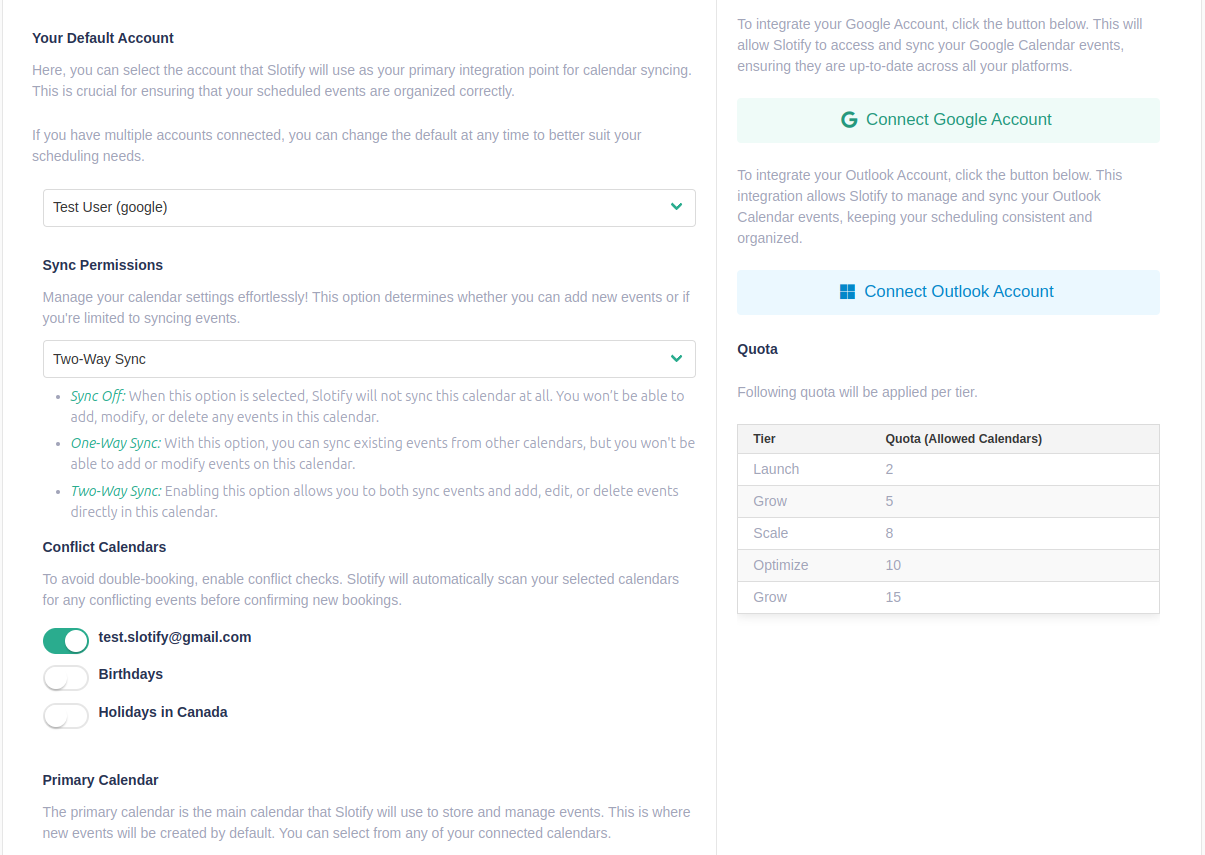
- Once you selected your Google account from the drop down it will show more options under the drop down.
- Sync Permissions:
- Sync Off: Calendar events will not be synced to Slotify and Slotify will not create events in this calendar.
- One-Way Sync: Only events from connected calendar will be synced to Slotify. Slotify will not create events in this calendar.
- Two-Way Sync: Calendar events will be synced to and from Slotify to Connected Calendar.
- Conflict Calendars: you need to select list of calendars that you want to check for conflicts if you have more than one calendars.
- Primary Calendar: you need to select Primary calendar where Slotify will create events and Slotify can sync events from.
- Sync Status: in this section you will see list of all connected calendars and their sync status.
- Remove Account: in case you no longer wish to be connected with your Google account you can remove using Remove Account button.
- Sync Calendar: in case of issues with event sync you can manually sync your calendar events using Sync Calendar button.